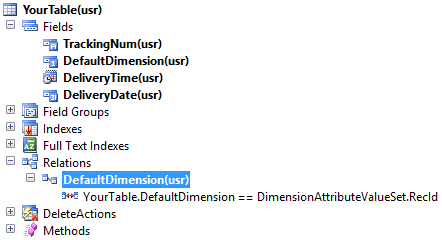
1. Drag the EDT (AOT >> Data Dictionary >> Extended Data Types >> DimensionDefault) to the fields of your table
2. Create a new “Normal” relation on your table linking the newly added “DefaultDimension” field to the “RecId” field of DimensionAttributeValueSet table
3. Now create a view for your table. Take care of the following conventions:
- View should be named exactly DimAttributeYourTable
- Add your table to DimAttributeYourTable >> Metadata >> Data Sources node
- This data source should be named exactly BackingEntity
- Add the following three fields naming them exactly as mentioned
- Key – Use surrogate key field e.g. RecId
- Value – Use natural key field e.g TrackingNum
- Name – Use any descriptive field e.g. DeliveryName
4. Create and run the following job to clear the dimension cache:
static void clearCache(Args _args)
{
    DimensionCache::clearAllScopes();
    info("done");
}
5. Now open General Ledger >> Setup >> Financial dimensions >> Financial dimensions
6. Create a new financial dimension
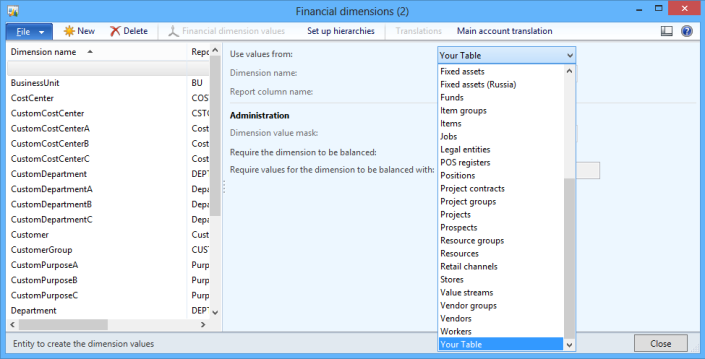
7. Select your newly added dimension from the “Use values from” lookup:
6. Create a new financial dimension
7. Select your newly added dimension from the “Use values from” lookup:
Now if you want to add this financial dimension to any of the existing chart of accounts, perform the following steps:
1. Open General Ledger >> Setup >> Chart of accounts >> Configure account structures
2. Select any of the active account structures e.g. “Account Structure P&L (Active)”
3. Click Edit button
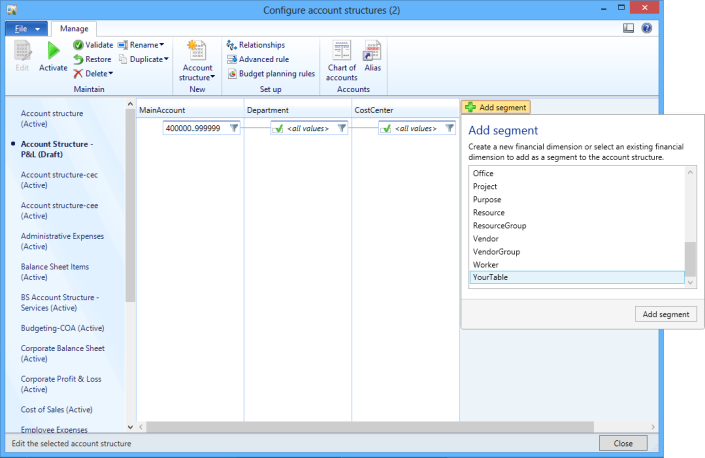
4. Click Add segment button
5. Select the newly added dimension
6. Finally activate the dimension to let the changes take effect.
2. Select any of the active account structures e.g. “Account Structure P&L (Active)”
3. Click Edit button
4. Click Add segment button
5. Select the newly added dimension
6. Finally activate the dimension to let the changes take effect.


No comments:
Post a Comment